Making A Perfect Campfire Steak
Many people throughout the entire country (and the world as a whole) appreciate a good, juicy steak. Steak can come in many forms, from simple to fancy, and from various cuts. There are flank steaks, skirt steaks, sirloin steaks, T-bone steaks, and more! If you want to enjoy a delicious steak on your camping trip, do not despair, as it can be as straightforward or as complex a process as you wish. Read on to discover our steps to a perfect campfire steak!
What You Will Need
When we say a "perfect campfire steak," we do not mean it literally. Everyone has their preference for cut, doneness, seasoning, and preparation. But if you try this method out, you may find it a bit addicting!
The ingredients you will need are as follows:
- Salt (Use a grinder with an adjustable coarseness, we will want large slat flakes.)
- Black pepper (Same as the salt, use a grind with an adjustable coarseness.)
- Smoked paprika
- Unsalted butter
- Fresh rosemary
- Fresh thyme
- Fresh garlic cloves
- Olive oil
- Your preferred cut of steak, such as a T-bone steak (Flank and skirt steak are not recommended for this method)
You will also need the following equipment:
- Cast iron skillet
- Tongs for flipping the steak
- A grill or stand for placing over the campfire
- A sharp knife
- A cutting board
- A spoon for basting
Preparation
Begin by taking your steak out of the refrigerator or cooler and allowing it to warm up for at least thirty minutes. This may sound odd, but it will help result in a more tender steak. When cold meat is taken out of the refrigerator and immediately put on a hot pan or grill, the temperature shock causes the meat fibers to contract and tighten, making it tough, chewy, and dry.
While the steak is warming up, dry off any moisture with a paper towel and give it a generous sprinkle of coarsely ground salt. The salt will penetrate the meat, adding to its flavor and drawing out excess moisture. This may sound like it would give you dry steak, but the moisture that the salt draws out is only on the surface level of the meat. Removing excess moisture from the surface of the steak in this manner adds flavor and makes it far easier to develop a delicious "crust" on the surface of your steak. While your salted steak is warming up, take a few whole cloves of garlic and smash them with the flat side of your knife. Cut up any vegetables or prepare any sides you wish to have alongside your steak.
Ten minutes before your steak is done warming up, put your grill or stand over the fire and sit your cast iron skillet on top to allow it to heat up. Add in enough olive oil to lightly cover the bottom of the skillet.
While the cast iron skillet is heating up, dry off your steak once more with a paper towel. Season it liberally with coarse black pepper and smoked paprika. Once the oil in the skillet has heated up you will be ready to cook!
Note: You should hear a sizzle when you place your steak in the pan. If you do not hear a sizzle, take your steak out and wait for the pan to heat up more.

Cooking
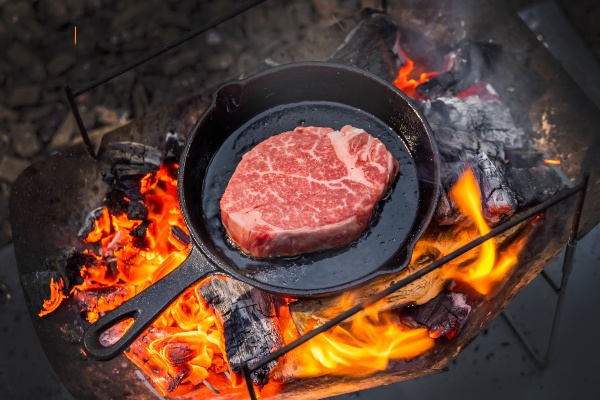
Here is where things will go quickly. Using your tongs (or your fingers if you are brave), place the steak in the cast iron skillet, laying the cut of meat away from you to avoid splashing any hot oil on yourself. You should hear a sharp sizzling sound immediately. This is called searing the steak, as the high heat of the oil and pan cooks the outer layers of the steak quickly and the interior slowly. Do not touch, poke, prod, or slide the steak around until a crust forms on the side you are searing. This crust formation is called the Maillard Reaction, which is the browning that happens on food such as meats when exposed to high heat, enhancing flavor and aroma.
Once the crust has formed, you may flip your steak over. If your steak has a fat cap - a thick strip of fat on the outer edge of the steak - you will want to render it. Rendering the fat cap simply means melting the fat, which will add to the flavor. To render a fat cap, tilt the skillet back slightly to pool the oil at the back. Use your tongs to hold the steak on its side, with the fat cap submerged in the oil until it is translucent.
Once you flip your steak over, continue to sear that side as you did for the first side until a crust begins to develop. Once this crust develops, you will want to add in a generous helping of the butter (around half a stick of butter should be plenty), your cloves of smashed garlic, several sprigs of rosemary, and several sprigs of thyme. As the butter melts and mixes with the oil, garlic, rosemary, and thyme, use your spoon and tilt the skillet to splash the now scented and flavored butter over the steak. This is called "basting" and adds a further layer of flavor to the steak and moisture.
You may stop here or continue flipping the steak every minute and basting until you are close to your desired doneness. Keep in mind that a steak will continue cooking for at least five minutes as it rests, so only cook it in the skillet until around five to ten degrees under your desired doneness. A meat thermometer can help you keep track of your target temperature. Doneness internal temperatures are as follows:
- Rare - 120℉
- Medium Rare - 130℉
- Medium - 140℉
- Medium Well - 150℉
- Well Done - 160℉+
Once you have approached your desired doneness, take your steak, rosemary, thyme, and roasted garlic cloves out of the skillet and place them on the cutting board, but DO NOT CUT IT. Allow the steak to rest for at least five minutes, as this will allow the meat fibers to relax and the steak's juices to distribute more evenly throughout the cut.
While the steak is resting, take this opportunity to prepare any side dishes you want. Do not be afraid to use the leftover oil and butter in the pan to fry up something else in all those delicious steak juices. Add some red wine and beef broth, and you have a fantastic au jus sauce. Do not throw away those roasted garlic cloves either. Smash them up into a paste and mix them with some mayo, and you have yourself a killer roasted garlic mayonnaise!
Plating
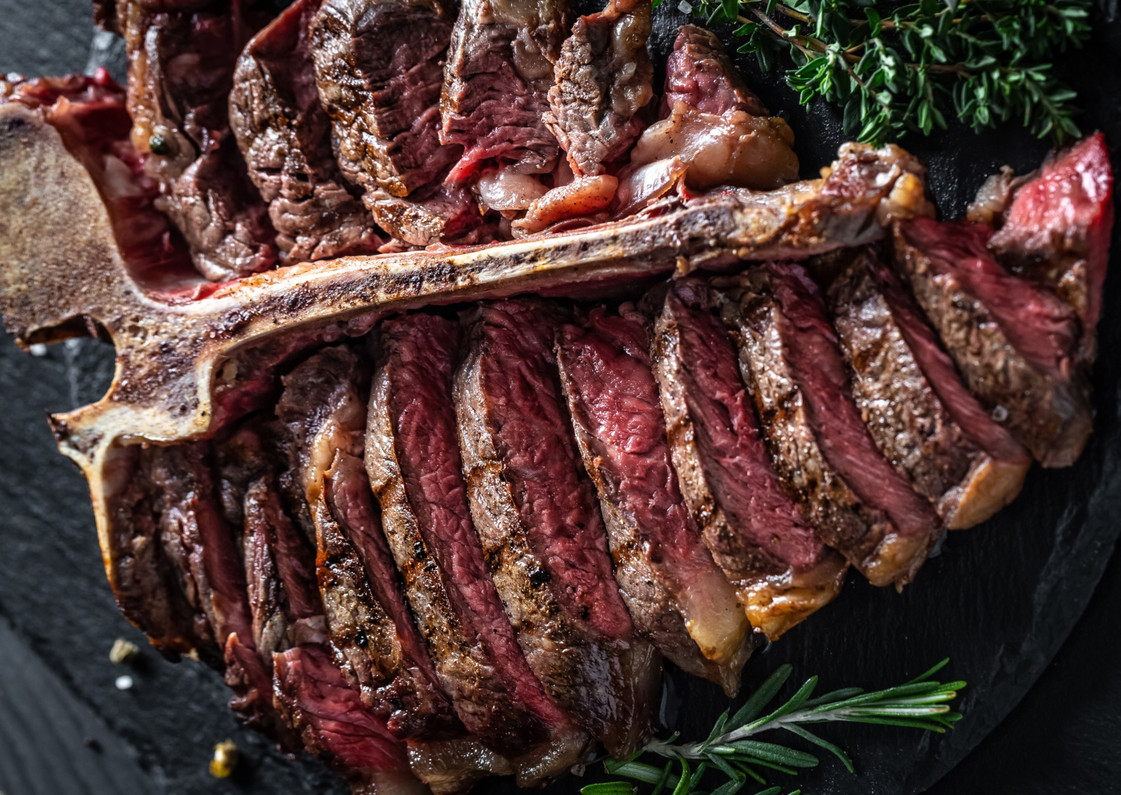
Really, you can plate your steak however you want. The only important thing is how you cut the steak. If you plan on cutting your steak instead of leaving it whole, keep in mind that you should slice against the grain of the meat. Cutting the steak in this manner makes it easier to chew, making the beef feel more tender as you eat it. If you created or have any sauce, place a bit on the bottom of the plate and layer your succulent steak strips on top, surrounded by your sides. Or slap it all on the plate high as a mountain and eat it like a caveman; it is your campout, after all!
Eat and Enjoy
When it comes right down to it, cooking a perfect steak is as much an art form as it is a science. Do not be afraid to try out different seasonings preparation methods or styles of cooking to figure out what you like best. Do you have a favorite recipe or cooking method for steak? Let us know!
Recent Posts
-
Traveling to the RV Hall of Fame in Elkhart, IN
If you are traveling to Elkhart, IN to see the RV Hall of Fame, getting off the toll road at exit 96 …Nov 14, 2025 -
Best RV Air Conditioners of 2025: An Expert Guide From RecPro
Quick Answers Best overall RV air conditioner: RecPro 15K Quiet AC with Heat Pump (RP-AC3800) Best f …Oct 29, 2025 -
The Nuclear Nomads Expand Sofa with New Recliner Section Install
The Nuclear Nomads are a full time RV family living in south Florida. Andi and Joey value quality ti …Oct 24, 2025 -
Trailer Wiring Guide: How to Wire Your Trailer for Safety and Efficiency
Table of Contents 1. Common Types of Trailer Connectors 2. Trailer Wiring Diagrams: Color Codes and …Aug 20, 2024 -
How to Keep Your Pets Safe While Camping
RVing and camping are a great getaway from the hustle and bustle of work and the city and the day-to …Jul 02, 2024 -
Why Replace Your RV Furniture?
You may wonder when is the best time to replace your RV furniture. There is no one right answer to t …May 20, 2024


